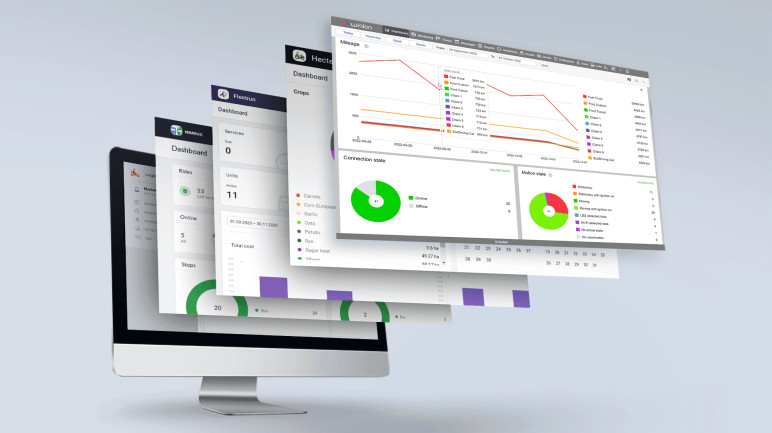
How to create a proper accounts hierarchy?

13 November, 2020
Oleg Zharkovsky
5ec2975e0b5c7

Wialon is multi-faceted. Select from multiple elements, tools, and configuration options, combine them, and adjust to your particular project. So as not to get lost in dozens of geofences, jobs, users, units, and routes, you need order.      

Accounts' hierarchy and the right structure of elements are the foundation of this order. Imagine a house with an improper foundation –  it quickly becomes non-habitable. 

That’s why the structure of accounts is the first thing we focus on when training Gurtam partners. This article is to share the experience about how to put in order your accounts, whether you work with 10 or 10,000 units.

Creating hierarchy: the key elements and rules

Before we discuss the recommended structure, let’s recall the elements you’ll work with and the rules you’ll adhere to.

Here is a list of the core elements in the monitoring system: 

  • The unit is an asset monitored by the system, with a tracker installed on it.  
  • The user is a human (or a group of users) having a login, a password, and configurable access to various system elements.  
  • The resource is a container that can be perceived as a toolkit. It contains geofences, jobs, notifications, drivers, trailers, passengers, report templates, and orders.
  • The account is a larger container that comprises all the elements mentioned above. 

The creation of an account is available in CMS Manager. You won’t find this functionality in the monitoring interface.  


These are the rules in accordance with which the elements interact with each other:

  • A subordinate item cannot have more rights or capabilities than a parent item. This applies to accounts, access rights, and other settings. For example, a user cannot have access to a unit if the user creator does not have it. Or an account cannot have access to Google Maps if such access is unavailable in the parent account.
  • All elements of the system have a creator. This is the system user on whose behalf this element was created and to whose account it is attached. You cannot withdraw all access rights to a unit from the unit creator (at least he will have the "View item and its basic properties" right).
  • Initially, every account always has one user who is its creator, and one resource. In the future, you can add units, as well as other users and resources, to the account. 
  • Any action in the system occurs on behalf of the user. The latter’s capabilities are determined not only by the list of user’s access rights in relation to the other elements but also by the list of services in the account which the user enters. The process of granting access can be accelerated by using access rights presets, and the process of assigning a list of services – by using a billing plan.

service elements

The main secret of an effective service structure

The key mistake when creating a hierarchy in Wialon is to use a single account for all users, and then, within this account, grant everyone the required amount of rights to units and resources. When the business expands and gains too many users, this approach stops working.

no structure is a wrong structure

We strongly recommend creating a separate account for each client, no matter how large it is. There, all the associated elements (units, resources, users) should be stored.

For granting access to the integrator’s specialists, we also advise creating an intermediate account named “Manager”.

service layers

Let’s discuss in more detail how to create such a structure and what are its advantages.

Creating the right service structure

When the service is activated, each new Wialon partner is provided with the top account. The top account has a unique name that serves as a global service identifier in the Wialon system.

You cannot create units or restore the resource contents in the top account. But it provides the user-creator with the unique functionality:

In addition to the top account, the partner is provided with a default billing plan containing all the purchased functions.

These are a system top account and a system billing plan, therefore, the service owner cannot edit them by himself (that is, without the involvement of Gurtam representatives).

What to do next

  • Create the necessary billing plans

In addition to the default billing plan, the integrator can create additional ones. This is an efficient way to limit user actions and determine the cost of services.

An additional billing plan can only be created by the user of the top account. Within it, the user defines a list of available services, their cost, as well as some basic properties (for example, the minimum balance at which the account is blocked, the minimum balance at which access to services is limited, the format for withdrawing the balance, etc.).

  • Create a manager account

As the top account has a special status and special functionality, we do not recommend providing access to it for all the integrator employees. We’d suggest using a manager account for your day to day work. A manager account is created under the top account, that is, it is located at the second level of the hierarchy. 

  • Transfer dealer rights

In order to further create accounts which are subordinate to a manager account, the latter must be granted dealer rights, and the list of those billing plans that it will transfer to users at a lower level. Since the manager account belongs to the integrator's company, all the service plans should be assigned to it.


We do not recommend creating units in an account with dealer rights and we advise you to use a client account for this (see below).


  • Create a client account

In the recommended structure, client accounts are located at the third level. As we mentioned earlier, we advise the integrator to create a new account for each new client, regardless of the number of units the client has: either it is basic monitoring of a single vehicle, or control of a fleet with 200 units.

The user from the client account should have the right to create new objects. Also, this account is the most suitable solution for storing units, users, resources with reports, geofences, etc., that will be used by clients.

Why using separate accounts is recommended

  • When units are created in sub-accounts, the system automatically grants access rights to the holder of the top account, which means that he/she preserves total control over all the elements without additional operations with access rights. 
  • You can grant access right to a resource and not to a report, geofence, or notification. That’s why you need separate resources for individual clients. As soon as you create an account, it already contains a resource that saves the time spent on configuration. Moreover, you can add extra resources here. 
  • In Account properties, you can disable services and, thus, hide the corresponding tabs in the monitoring interface and Unit properties.

two versions of the Dashboard

two versions of unit properties

  • Using the Services tab in Account properties, you can not only disable services but also limit them: no more than 40 geofences, 30 SMS or 15 units. When working with the Restrictions tab, you can schedule account blocking by days or balance. Moreover, you can export the configuration into a template file and apply for another client as an established billing plan.

account properties

  • It is easier to analyze account data in CMS and reports. Otherwise, it’s hard to understand what services a particular client uses (i.e., his billing plan) and how many units and other elements he created.
  • You can’t restore the resource contents of the top account after deletion. But the procedure is available for sub-accounts, so you won’t lose the data irrevocably. That way you don’t need to configure everything from scratch in case of problems.  
  • The recommended structure accelerates the loading speed of "heavy" accounts. This is important when the number of units is growing.
  • You can specify different storage periods only for separate accounts.

And what if you need a more complicated structure?

No problem: any structure can be enlarged and enhanced, the main thing is to stick to the logic described above.

Example 1

You work with a dealer and want to differentiate your and his accounts. Create a dealer’s account under the manager account. In terms of functionality, the former ones are similar to the manager account, but they belong to the dealer’s company, not the integrator's one. Do not forget to provide this account with dealer rights and transfer only the selected billing plans.

service layers

Example 2

You work with several offices, territories or different functionality and want to differentiate your account on this criterion. In this case, add intermediate accounts that unite integrator’s or dealer’s accounts according to a selected principle (by office location, service area, paid functionality, etc.).

criteria for different branches

For example, some of your units use Google Maps, which has paid access. If you create units for all clients under the same account (and not every unit needs Google Maps), Google may charge each unit and issue an unreasonably high bill. However, you can place objects that actually use the service in a separate branch of the hierarchy and significantly reduce costs.

Example 3

You have an extensive system of dealers, branches, and groups of clients. In this case, create a client, dealer, and intermediate account at the same level. This will not break the order under which the hierarchy is built and will allow you to consider levels within the branch of the hierarchy you need.

service expanded version


Be careful and don’t overcomplicate the structure. Any additional branch and increase in the number of account levels should solve a specific problem, like in our examples. Otherwise, it will only slow down the system.


How to change the current service structure

You can see the current service hierarchy as a tree-like drop-down list using the Service Hierarchy item in the CMS user menu. This functionality is available to top account users as well as dealers.

There are several ways to adjust the current service structure:

The Gurtam Technical Consulting department will assist with more serious changes (for example, the introduction of manager accounts or the transfer of accounts with all content). Contact the team via consulting@gurtam.com if you need help.


Compare your current service hierarchy with the one described above. Is everything done correctly? Creating a recommended hierarchy of accounts is a solid foundation for business growth. And it is worth the time it takes.

If you still have questions on how to create the right account structure, please address consulting@gurtam.com.

Oleg Zharkovsky
Oleg Zharkovsky
Oleg is Wialon Trainers Team Lead and Deputy Head of the Technical Consulting department at Gurtam. For more than 6 years, he has been helping to master Wialon to the partner community and Gurtam employees. He is also involved in processing the most complicated partner requests on fuel, sensors, reports, and other Wialon functionality.

Share

Related articles